Drywall Installation & Repair: What Homeowners and Commercial Property Owners Should Know
Drywall is the surface most people see when they look at a wall or ceiling, and it's easy to underestimate what goes into making it look flat, clean, and paint-ready. The visible result — a smooth wall with no visible seams — is the product of correct hanging, properly embedded tape, multiple coats of joint compound, drying time between each coat, careful sanding, and a primer that seals the surface before paint. Skip any of those steps, or rush the drying time between them, and the wall that looked fine in raw compound shows every joint, fastener, and imperfection the moment the paint goes on.
For homeowners and commercial property owners across Kentucky, Southern Indiana, Northern Kentucky, and Greater Cincinnati, understanding what goes into drywall installation and repair helps with planning, with evaluating estimates, and with knowing when a patch will solve a problem and when replacement is the right call. This guide covers the difference between residential and commercial drywall, installation versus repair versus replacement, the common reasons drywall needs attention, the types of drywall and where they're used, the installation process from hanging through priming, the finishing levels and how to choose one, what drywall costs and why, water-damage repairs, basement drywall, commercial fire-rated assemblies, the connection between drywall and painting, common mistakes, timelines, and the regional considerations that vary across our service territory. It's written for both residential and commercial property owners, because the fundamentals of a quality drywall finish are the same even when the scale and the specifications differ.
Quick answer: Drywall work is two trades in one: the hanging, which is the mechanical work of fastening panels correctly to prepared framing, and the finishing, which is the skilled work of taping, coating, sanding, and priming so the seams disappear and the surface is ready for paint. The finish level — from Level 1 to Level 5 — is specified based on the location, the lighting, the paint sheen, and the design expectations, and choosing the wrong level is how a wall either shows its seams under paint or pays for finish work it didn't need. Water-damaged drywall can only be repaired after the source of the water is corrected and the framing is dry, and commercial fire-rated assemblies have to be installed exactly as designed for the rating to be valid. The only accurate cost for your project comes from a site visit and a written estimate based on the actual scope and conditions.
Table of Contents
Understanding Residential and Commercial Drywall Services
Drywall is the surface most people see when they look at a wall or ceiling, and it's easy to assume it's just panels screwed to framing. In practice, drywall work is two trades in one: the hanging, which is the mechanical work of fastening panels correctly to a prepared substrate, and the finishing, which is the skilled work of taping, coating, sanding, and preparing those panels so the seams disappear and the surface is ready for paint. Both halves have to be done well, and the quality of the finish is what determines whether a wall looks flat and clean under paint or shows every joint, fastener, and imperfection. That's true in a single residential room and it's true across a commercial buildout — the scale changes, the standard doesn't.
Residential and commercial drywall applications overlap in fundamentals but differ in scale, material specification, and the code requirements that apply. Understanding which category your project falls into helps set realistic expectations for scope, scheduling, and cost.
- Residential drywall examples
- New interior walls, basement finishing, kitchen and bathroom renovations, ceiling installation, room additions, water-damaged drywall replacement, and interior wall repairs.
- Commercial drywall examples
- Office renovations, tenant improvements, commercial partitions, restroom renovations, retail buildouts, fire-rated wall assemblies, ceiling repairs, and commercial remodeling.
Commercial projects may require additional attention to rated assemblies, accessibility, scheduling around an occupied building, and inspections that residential work doesn't always trigger. Not all commercial wall assemblies are interchangeable — a fire-rated partition, a sound-rated wall, and a standard partition each follow a specific assembly design, and the materials and fastener schedule have to match that design for the rating to be valid. Assuming any commercial wall is just drywall on studs is how a rated assembly ends up non-compliant without anyone realizing it.
Drywall Installation vs. Drywall Repair vs. Replacement
Drywall work falls into three broad categories, and the right one depends on the extent of the damage, the condition of the substrate behind it, any moisture exposure, and the finish the surface needs to reach. Choosing the wrong approach — patching something that should be replaced, or replacing something a patch would have handled — is how a drywall repair either fails to hold up or costs more than it needed to.
- New drywall installation
- Hanging and finishing panels on framing that hasn't been drywalled before — a new addition, a basement finish, a newly framed partition. The full process from hanging through Level 4 or 5 finish applies.
- Localized patching
- Small repairs — a doorknob hole, a single water stain, a cracked corner bead — where the surrounding drywall is sound and only the damaged area needs to be cut out and refinished.
- Drywall finishing repairs
- Fixing seams, ridges, nail pops, or poor previous taping without removing full panels — re-taping a cracked joint or re-skimming a surface that wasn't finished cleanly the first time.
- Partial panel replacement
- Removing and replacing a section of drywall — a water-damaged area, a section over a repaired leak — where the damage is larger than a patch but doesn't require the whole wall to come down.
- Full drywall replacement
- Removing and replacing complete walls or ceilings, typically after significant water damage, widespread failure, or a full renovation that exposes the framing.
The appropriate approach depends on the extent of the damage, the substrate conditions behind the drywall, any moisture exposure, and the intended finish. A patch over a leak that hasn't been fixed is a repair that will fail. A full replacement for a doorknob hole is scope that didn't need to happen. Matching the repair to the actual condition is what makes the fix last — and that starts with understanding what caused the damage in the first place.
Common Reasons Drywall Needs Repair
Drywall damage is usually a symptom of something else — an impact, a moisture problem, movement in the structure, or a previous repair that didn't hold. Identifying the cause matters because repairing the drywall without addressing what caused it means the same damage comes back. These are the most common reasons drywall ends up needing attention:
- Accidental impact damage
- Doorknob holes, furniture scuffs, and impact breaks are the most common residential repairs — usually a clean patch and refinish when the surrounding wall is sound.
- Cracks at joints
- Cracks along taped seams often indicate movement, settling, or a joint that wasn't reinforced properly. Recurring cracks deserve evaluation before they're re-taped.
- Nail or screw pops
- Fasteners backing out of the framing create visible bumps and cracks. Pops can be a sign of framing movement, moisture changes, or fasteners that were over-driven or under-driven.
- Water stains and plumbing leaks
- Discoloration, softness, or bubbling from a leak above or behind the wall. The leak has to be corrected and the drywall dried or replaced before any finish work.
- Roof leaks
- Ceiling stains and sagging from a roof leak follow the same rule — the source has to be fixed before the drywall is restored, or the repair fails.
- Settling-related movement
- Cracks that follow a pattern — often diagonal from corners of doors and windows — can indicate structural movement that should be evaluated before cosmetic repairs.
- Damaged corners
- Dented or cracked corner bead makes corners look rough and is a common repair in high-traffic areas like hallways and entryways.
- Poor previous repairs
- A bad patch — visible seams, mismatched texture, humps in the wall — sometimes has to be redone correctly before the surface will look right under paint.
- Ceiling damage
- Sagging, cracking, or water damage in ceilings can involve larger panels, access challenges, and the need to protect everything underneath during the repair.
Recurring cracks or water damage may indicate an underlying problem that should be evaluated before cosmetic repairs. Taping over a crack that comes from movement, or painting over a stain from an active leak, is a repair that won't last — the cause has to be addressed first.
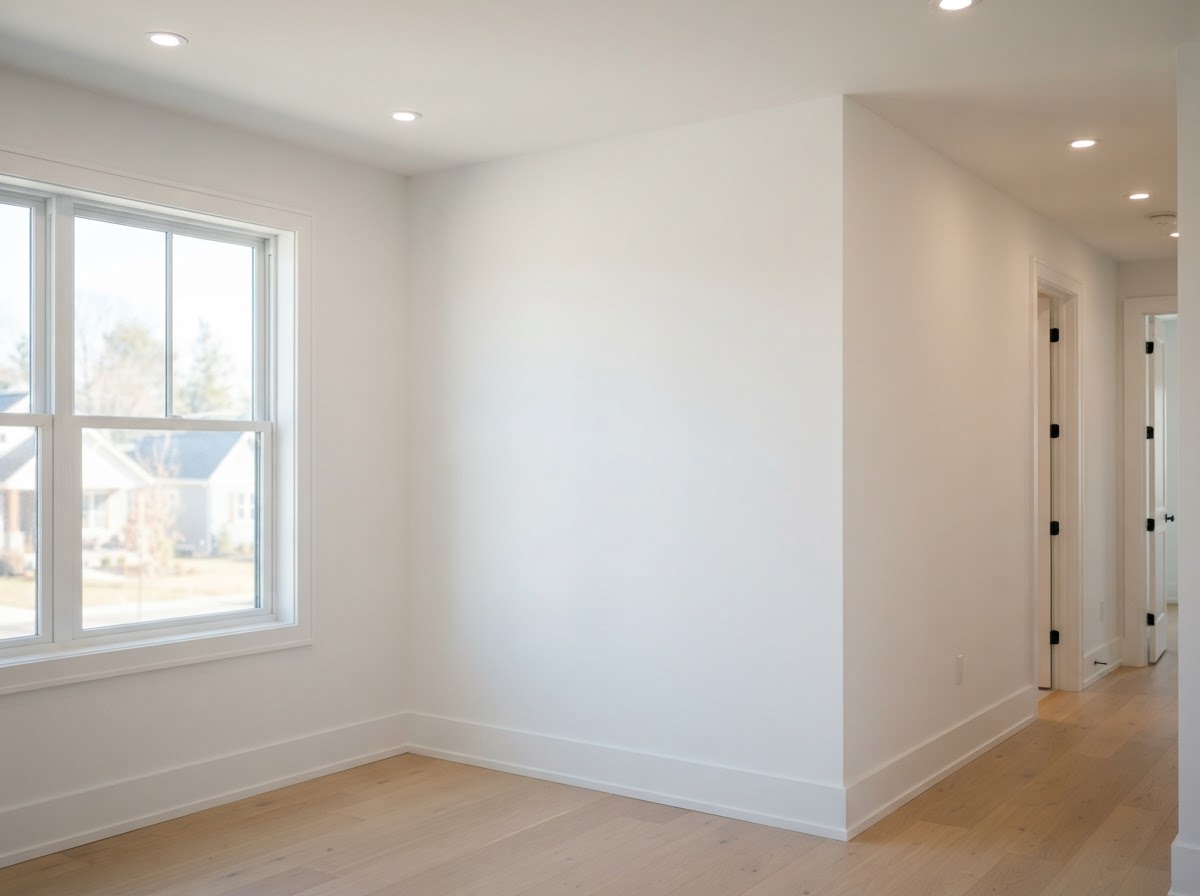
A smooth, paint-ready drywall surface is the result of correct hanging, taping, multiple coats, and careful sanding — the finish is where the seams disappear.
Types of Drywall and Where They Are Used
Not all drywall is the same material. Different panels are manufactured for different locations and performance requirements, and using the wrong panel in the wrong place is a common source of problems — standard drywall in a wet area, or a non-rated panel where a rated assembly is required. Material selection depends on the location, the applicable codes, the assembly design, and what the project actually needs.
- Standard gypsum wallboard
- The default panel for most interior walls and ceilings in dry areas — economical, widely available, and suitable for the majority of residential living spaces.
- Moisture- and mold-resistant panels
- Used in bathrooms, kitchens, laundry rooms, and other humid areas to resist moisture absorption. These panels help in damp locations but are not a substitute for proper shower waterproofing behind tile.
- Fire-rated gypsum board
- Panels formulated and tested to contribute to fire-resistant assemblies, used where a fire rating is required by code or design.
- Type X gypsum board
- A specific fire-rated panel with enhanced fire resistance, often required in rated assemblies, garages, and attached dwellings where the code calls for it.
- Abuse-resistant panels
- Higher-density panels designed to resist impact and abrasion, used in high-traffic commercial areas, corridors, and spaces where walls take more abuse.
- Sound-control assemblies
- Panels and assembly designs that improve sound transmission performance between rooms or units, used in multi-family, office, and shared-wall applications.
- Ceiling-rated panels where appropriate
- Some ceilings require panels rated for sag resistance at wider spacing, and the panel selection has to match the framing and the span.
Two clarifications worth making: moisture-resistant drywall helps in a humid room, but it is not a waterproofing layer — a tiled shower wall still requires a proper waterproof membrane behind the tile. And a fire-rated panel alone does not create a compliant fire-rated assembly; the entire assembly — the panels, the framing, the fasteners, the joints, and any penetrations — has to match the tested or approved design for the rating to be valid. The panel is one component of the system, not the system itself.
Understanding the Drywall Installation Process
Drywall installation moves through a defined sequence, and each stage depends on the one before it. The framing has to be ready before panels go up; the panels have to be hung correctly before taping starts; each coat of compound has to dry before the next goes on; and the surface has to be sanded and primed before paint. Rushing a stage — or skipping the drying time between coats — is how a finish that looks fine in raw compound shows every seam once the paint hits it.
- Stage 1 — Site evaluation and preparation
- Review framing for flatness and alignment, confirm mechanical rough-ins (electrical, plumbing, HVAC) are complete and inspected, verify insulation is in place, and check for any moisture concerns before any panels go up.
- Stage 2 — Measuring and hanging drywall
- Panels are measured, cut, and fastened to framing with the correct fastener schedule. Layout matters — joints are staggered, corners are handled correctly, and fasteners are driven to the right depth without breaking the paper.
- Stage 3 — Taping and joint compound
- Joints, inside and outside corners, and fastener heads are taped and coated with joint compound. The tape reinforces the seam so it doesn't crack; the compound bridges and feathers the joint to the surrounding surface.
- Stage 4 — Additional coats and sanding
- Successive coats of compound build out and feather the joints, each drying before the next is applied. Sanding between coats and after the final coat smooths the surface and removes ridges so the seams disappear under paint.
- Stage 5 — Final finish, primer, and paint preparation
- A final inspection of the surface, any touch-ups, dust removal, and a primer coat that seals the compound and provides a uniform surface for the finish paint.
The actual sequence and drying times vary depending on the materials, the humidity, the temperature, and the site conditions. Joint compound doesn't dry on a schedule — it dries when the moisture leaves it, which is faster in warm, dry conditions and slower in cool, damp ones. A finish rushed in poor drying conditions is a finish that shows its seams under paint, no matter how carefully it was troweled.
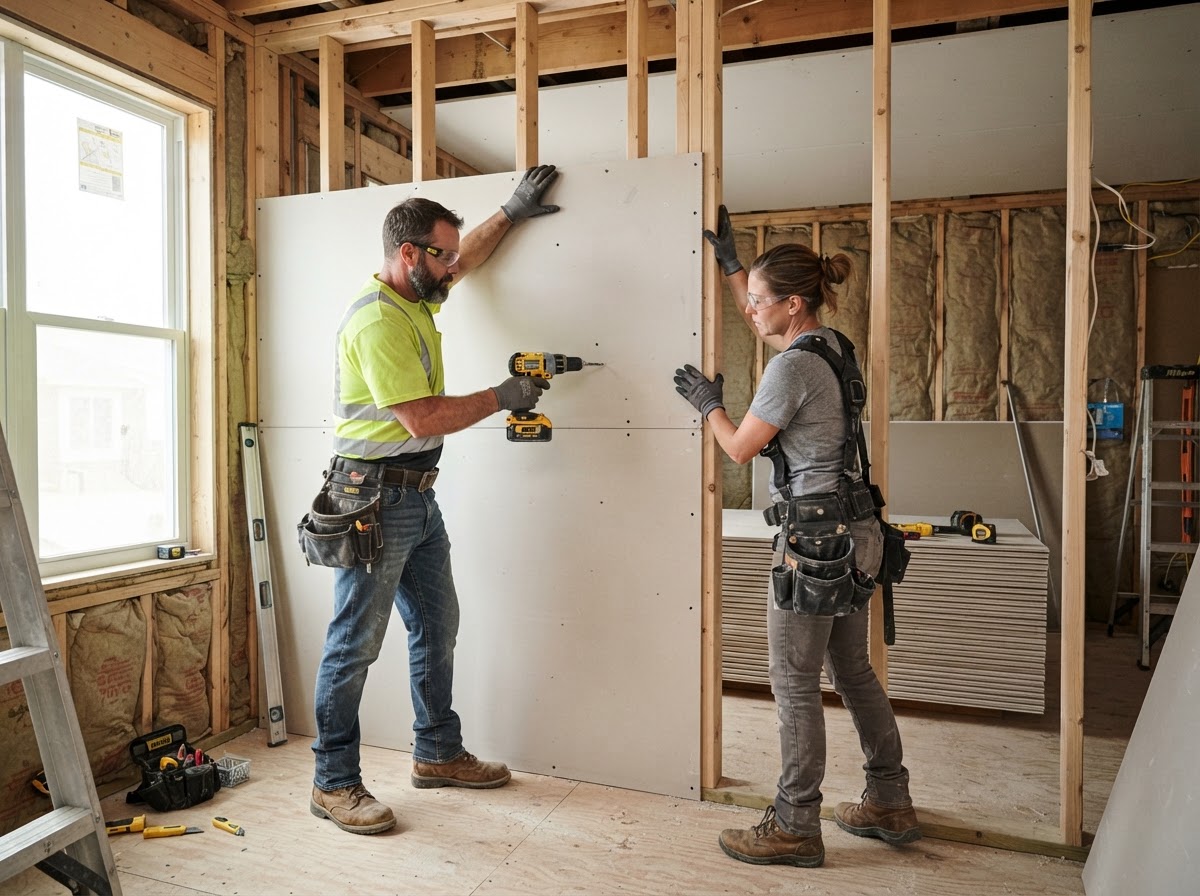
Hanging is the mechanical half of drywall work — correct panel layout, fastener depth, and joint placement set up the finishing that follows.
Drywall Finishing Levels Explained
Drywall finishes are specified by level, from Level 0 (just fastened in place) to Level 5 (a full skim coat over the entire surface). The level specified depends on the location, the lighting, the paint sheen, the wall texture, and the design expectations — and specifying the wrong level is how a wall either gets under-finished (seams show under gloss paint) or over-finished (money spent on a Level 5 skim coat that a textured ceiling didn't need).
- Level 0
- No taping, finishing, or accessories required. Used in temporary construction or areas that won't be visible in the finished space.
- Level 1
- All joints and interior angles have tape embedded in joint compound. Used in concealed areas like above ceilings or behind walls that won't be finished.
- Level 2
- Tape embedded in compound with one separate coat over joints, angles, fasteners, and accessories. Used in areas that will receive tile, or in utility and storage areas where appearance isn't critical.
- Level 3
- Tape plus two separate coats over joints, angles, fasteners, and accessories. Used where a heavy or textured finish will be applied, which helps conceal the surface.
- Level 4
- Tape plus three separate coats over joints, angles, fasteners, and accessories. The standard finish for most residential and commercial walls receiving flat or matte paint, and the most common specified level.
- Level 5
- A full skim coat of compound over the entire surface, in addition to the Level 4 work. Used where gloss or enamel paints will highlight any imperfection, in critical lighting areas, or where the highest-quality finish is required.
Lighting conditions, paint sheen, wall texture, and design expectations all influence the specified finish level. A flat paint in a normally lit room hides a lot; a gloss paint in raking light hides nothing. Level 5 is not automatically necessary for every project — it's specified where the conditions demand it, and over-specifying it adds cost without visible benefit in most residential rooms. The right level is the one that produces a finish that looks correct under the paint and lighting the wall will actually see.
How Much Does Drywall Installation and Repair Cost in 2026?
Drywall pricing ranges widely because the scope ranges widely — from a single patch to a full home or commercial buildout. The factors that influence cost include the square footage, the ceiling height and access, whether demolition and disposal of existing drywall is required, the panel type, the specified finish level, the number of coats, whether texture is applied, and whether the work is in an occupied space. The ranges below are broad national and regional averages drawn from widely cited drywall cost sources current as of the article date — not contractor quotes, and not a guarantee of what your specific project will cost. The only accurate number comes from a site visit and a written estimate based on the actual scope.
Cost ranges below are broad national/regional averages for planning, not quotes. Drywall costs depend on the project size, ceiling height, access, demolition, panel type, finish level, texture, and whether the work is in an occupied space. Every project is estimated individually based on actual scope.
- Drywall hanging
- The mechanical work of fastening panels to framing is priced per square foot and varies with ceiling height, access, and panel type.
- Taping and finishing
- Finishing is priced separately from hanging and scales with the finish level — Level 4 is more work than Level 2, and Level 5 adds a full skim coat over the entire surface.
- Ceiling drywall installation
- Ceilings cost more per square foot than walls due to access, the need for lifts or scaffolding, and the difficulty of finishing overhead.
- Drywall patching
- Small repairs are typically priced by the job rather than by the square foot, with cost driven by access, matching existing texture, and the size of the area.
- Water-damaged drywall replacement
- Replacement after water damage includes demolition, disposal, drying time, and often matching the surrounding texture — and it presumes the source of the water has been corrected.
- Commercial drywall installation
- Commercial scope carries additional factors: rated assemblies, larger scale, scheduling around operations, and inspection requirements that residential work may not trigger.
- Specialty panels and Level 5 finishing
- Moisture-resistant, fire-rated, abuse-resistant, and sound-control panels cost more than standard wallboard, and a Level 5 skim coat adds labor across the entire surface.
Ceiling height, access, demolition, disposal, finish level, and project size all affect cost — a small patch in an occupied home isn't priced the same way per square foot as a full basement finish, and a Level 5 commercial lobby isn't priced like a Level 4 residential bedroom. The reason no two drywall projects have the same price is that no two drywall projects have the same scope, conditions, and finish requirements. That's why drywall is estimated from a site visit, not priced from a flat rate.
Drywall Repairs After Water Damage
Water damage is one of the most common reasons drywall ends up being replaced rather than patched, and it's also the situation where the order of operations matters most. The source of the water — a plumbing leak, a roof leak, flooding, or ongoing moisture intrusion — has to be identified and corrected before any drywall restoration begins. Restoring drywall over an active leak, or over framing that hasn't dried, is a repair that will fail, grow mold, or both. The drywall is the last step, not the first.
- Plumbing leaks
- A slow leak behind a wall can saturate drywall and framing long before it's visible. The leak has to be repaired and the area dried before any finish work.
- Roof leaks
- Ceiling drywall damaged by a roof leak follows the same rule — the roof has to be fixed and the ceiling dried or replaced before any patch will hold.
- Flooding
- Flooding can saturate drywall and insulation up the wall above the water line. Wet materials have to be removed, the cavity dried, and replacement installed only after the framing reaches an acceptable moisture content.
- Moisture intrusion
- Ongoing moisture from condensation, poor ventilation, or exterior water entry causes recurring stains and deterioration that won't stop until the moisture source is addressed.
- Material deterioration and mold-related concerns
- Saturated drywall loses structural integrity and can support mold growth. Damaged materials are removed, the affected area is evaluated, and replacement proceeds only after the cause is corrected and the substrate is dry.
- Proper drying and evaluation
- Framing and cavities have to be dried to an appropriate moisture level before new drywall goes up. Closing wet framing behind new drywall traps the moisture and creates the same problem over again.
- Replacement of unsalvageable materials
- Drywall that has lost integrity, is mold-contaminated, or has been wet for an extended period is removed and replaced rather than dried in place.
Painting over water damage is not an adequate repair. The stain will bleed through, the underlying material may still be wet, and any active leak will continue to damage the new finish. The source has to be corrected, the materials dried or replaced, and the surface properly prepared before any paint goes on.
Drywall Installation for Basement Remodeling
Basement drywall has its own set of considerations because it sits below grade, against foundation walls, in an environment with different moisture behavior than the rest of the house. A basement finish done correctly starts with moisture management — evaluating the foundation walls and floor for water entry, addressing any drainage or humidity issues, and choosing materials and assemblies appropriate for below-grade conditions. The drywall is one of the last things to go in, and it depends on all of the preparation underneath and behind it being done right.
- Moisture management
- Foundation walls and the slab should be evaluated for moisture before any framing or drywall goes up. A basement with a moisture problem has to be corrected before it's finished.
- Framing
- Basement walls are typically framed off the foundation with a gap for moisture, using materials and methods appropriate for below-grade contact.
- Insulation
- Insulation and vapor-control details have to match the assembly and the applicable code — the wrong vapor strategy in a basement traps moisture and creates problems.
- Wallboard selection
- Moisture- and mold-resistant panels are commonly used in basement applications to improve performance in a naturally more humid environment.
- Ceiling access
- Basement ceilings often have plumbing, electrical, and ductwork above them. The ceiling finish has to plan for access to mechanical shutoffs, valves, and junctions.
- Mechanical systems and finished surface requirements
- Rough-ins have to be complete and inspected before drywall, and the finished surface has to meet the requirements for the intended use of the space.
Basement drywall is part of a larger basement finishing scope, and it depends on the moisture, framing, insulation, and mechanical work being done correctly first. For a deeper look at the full basement finishing process — moisture evaluation, egress, permits, and the decisions that come before drywall — our basement remodeling guide covers the project from planning through completion.
Related reading
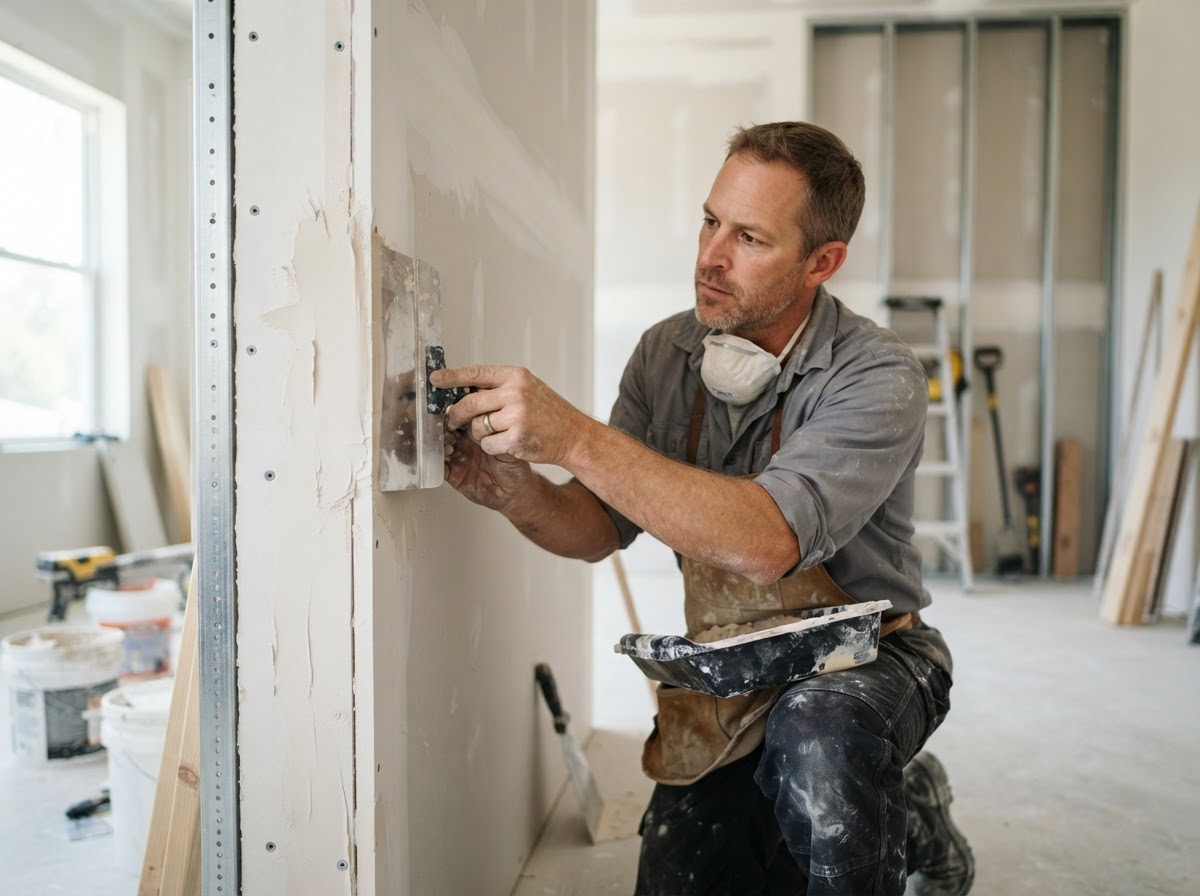
Taping and finishing is the skilled half of drywall work — the compound has to dry between coats, and the surface has to be sanded and primed before paint.
Commercial Drywall and Fire-Rated Assemblies
Commercial drywall often involves rated assemblies — walls and ceilings designed and tested to meet a specific fire-resistance rating. A rated assembly isn't just a panel; it's a system that includes the framing, the panels, the fastener schedule, the joint treatment, and the protection of any penetrations. Every component has to match the tested or approved design, or the rating isn't valid. That's why commercial drywall work demands closer attention to assembly details than most residential hanging and finishing.
- Approved assembly designs
- Rated walls and ceilings are built to a specific listed assembly — the panel type, the framing, the layers, and the fasteners all have to match the design.
- Fire resistance ratings
- The rating (e.g., 1-hour, 2-hour) is a property of the assembly, not the panel. The entire assembly has to be installed as tested for the rating to apply.
- Correct materials and fastener schedules
- Substituting a panel, changing the fastener pattern, or omitting a layer can void the rating. The materials and fastener schedule follow the assembly design exactly.
- Joint treatment and penetration protection
- Joints and any penetrations — electrical boxes, pipes, ducts — have to be protected per the assembly and code so the rating isn't compromised at those points.
- Inspection requirements
- Rated assemblies typically require inspection, and concealed work may need approval before it's closed up. Skipping inspections on a rated wall creates a compliance problem that's expensive to fix after the fact.
Fire-rated assemblies must be installed according to their tested or approved design and the applicable codes — there's no universal fire-rating requirement that applies to every wall, and not every commercial partition is a rated assembly. Where a rating is required, the assembly has to be built as designed; where it isn't, a standard partition may be perfectly appropriate. Knowing which is which is part of scoping commercial drywall correctly.
Drywall and Painting — Why Surface Preparation Matters
The quality of a painted wall is determined as much by what's underneath the paint as by the paint itself. Drywall that wasn't sanded cleanly, joints that weren't feathered far enough, fastener heads that weren't spotted enough times, or dust that wasn't removed before priming all show through the finish — and once the paint is on, those problems are expensive to fix. Surface preparation is the bridge between drywall finishing and painting, and skipping it is the most common reason a paint job looks uneven.
- Proper sanding
- Sanding smooths ridges, feathers joints into the surrounding surface, and removes tool marks. Under-sanding leaves visible seams; over-sanding damages the paper face.
- Dust removal
- Sanding dust has to be removed before primer. Dust under primer prevents adhesion and creates a rough surface under the finish coat.
- Primer
- Primer seals the porous joint compound and provides a uniform surface for the finish paint. Skipping primer, or using the wrong primer, causes uneven sheen and flashing.
- Surface defects and paint sheen
- Higher-sheen paints highlight imperfections that flat paints hide. A gloss or semi-gloss finish demands a higher level of drywall preparation than a flat finish.
- Lighting conditions and texture consistency
- Critical lighting — raking light along a wall or ceiling — reveals every ridge and imperfection. Texture can help conceal minor variations, but it has to be consistent across the surface.
- Final finish quality
- The finished wall is the result of the drywall and the paint together. A great paint job over poorly prepared drywall still looks like poorly prepared drywall.
Poor drywall preparation remains visible after painting — that's the core point. A ridge in a joint, a fastener that wasn't spotted, or a poorly feathered seam all telegraph through the finish coat, especially under gloss paint or critical lighting. The preparation before the paint is what makes the paint look right, which is why drywall and painting are best planned as one coordinated scope rather than two separate trades that don't talk to each other.
Related services
Common Drywall Installation and Repair Mistakes
Most drywall problems that show up after paint trace back to a decision made during hanging or finishing — a panel hung wrong, a coat rushed, a surface under-prepared, or a repair done over an unresolved cause. These are the mistakes that show up most often, and each one is cheaper to avoid than to fix after the paint is on:
- Installing drywall over unresolved moisture problems
- Closing up wet framing or finishing over an active leak traps moisture and causes the new drywall to fail the same way. The moisture source has to be corrected first.
- Poor panel layout
- Joints that line up across multiple panels, or panels that don't stagger, create weak seams and visible ridges. Layout is planned, not improvised.
- Incorrect fastener installation
- Fasteners driven too deep break the paper and lose holding power; fasteners not driven deep enough create bumps that show through paint. The right depth matters.
- Inadequate joint reinforcement
- Tape that isn't properly embedded, or joints without enough compound underneath, cracks along the seam. The tape reinforces the joint — it has to be bedded in compound, not just laid on top.
- Rushing joint compound drying
- Applying the next coat before the previous one is dry traps moisture and causes cracking, bubbling, or a soft surface. Compound dries when it dries, not on a fixed clock.
- Excessive sanding
- Over-sanding cuts into the paper face of the panel, creating a fuzzy surface that shows through paint and weakens the joint. Sanding smooths; it doesn't remove material.
- Ignoring framing irregularities
- Drywall follows the framing. A bowed stud or misaligned framing creates a wavy wall that no amount of finishing fully corrects. Framing has to be checked before panels go up.
- Using unsuitable drywall materials
- Standard drywall in a wet area, or a non-rated panel in a rated assembly, is a material in the wrong place. Panel selection has to match the location and the requirements.
- Selecting an inappropriate finish level
- A Level 2 finish under gloss paint shows every seam; a Level 5 skim coat under a textured ceiling is money spent where it isn't visible. The level has to match the finish and the lighting.
- Failing to prepare surfaces before painting
- Dust, ridges, and unspotted fasteners all show through the finish coat. Surface preparation is part of the drywall scope, not something the painter is expected to fix.
- Improper repairs to rated assemblies
- Patching or modifying a fire-rated wall without following the assembly design can void the rating. Rated assemblies are repaired per their listed design, not with a standard patch.
- Choosing a contractor based solely on the lowest estimate
- A low drywall bid that skips coats, rushes drying, or under-specifies the finish level isn't cheaper — it's incomplete, and the difference shows up under paint.
How Long Does Drywall Installation and Finishing Take?
Drywall timelines are driven more by drying time than by the physical work of hanging and coating. Hanging panels is fast; waiting for each coat of compound to dry is what stretches the schedule. A small patch may be done in a day or two; a full home or commercial buildout takes longer because each coat has to dry across the entire scope before the next can go on. The variables that affect timing include project size, the number of rooms, ceiling heights, panel types, the specified finish level, drying conditions, required inspections, repair complexity, and scheduling with other trades.
- Project size and number of rooms
- Larger scopes take longer simply because there's more surface to hang, coat, and sand — and more drying time across that surface.
- Ceiling heights and access
- High ceilings and difficult access slow both hanging and finishing and may require lifts or scaffolding.
- Finish levels and drying conditions
- Higher finish levels mean more coats and more drying time. Cool, humid conditions extend drying time between coats; warm, dry conditions shorten it.
- Temperature and humidity
- Joint compound dries by losing moisture to the air. High humidity or low temperature slows that process and extends the schedule.
- Required inspections
- Concealed work — behind rated assemblies, in some permitted scopes — may need to pass inspection before the drywall closes it up, which is a scheduling step.
- Repair complexity and scheduling with other trades
- Repairs that involve matching texture, or drywall that has to coordinate with plumbing, electrical, or flooring trades, add steps to the timeline.
There's no fixed completion timeline that applies to every drywall project, and anyone who promises one without seeing the scope is guessing. The honest answer is that drywall takes as long as the drying conditions and the finish level require — and that a schedule rushed by skipping drying time produces a finish that shows it.
Residential vs. Commercial Drywall Project Planning
Residential and commercial drywall share the same fundamentals — hanging, taping, coating, sanding, priming — but the planning around them differs. Commercial projects involve larger scale, rated assemblies, scheduling around an occupied or operating building, and inspection requirements that residential work may not trigger. Understanding the differences helps both homeowners and commercial property managers see why a clearly documented scope matters on both sides.
- Project scale and scheduling
- Residential work is typically smaller and scheduled around a household; commercial work is larger and often scheduled around business operations that can't fully stop.
- Material specifications and fire-rated assemblies
- Commercial projects more often involve rated assemblies, abuse-resistant panels, and sound-control specifications that have to match the design exactly.
- Access and occupied buildings
- Commercial drywall in an occupied building means dust control, after-hours scheduling, and coordination with tenants — factors that residential work usually doesn't carry.
- Inspections and finish expectations
- Commercial work may require inspections of concealed assemblies and a higher standard of finish in visible areas, depending on the use of the space.
- Trade coordination
- Both residential and commercial drywall depend on mechanical rough-ins being complete and inspected first, but commercial coordination often involves more trades and tighter sequencing.
In both cases, the scope should be clearly documented — the panel types, the finish level, the areas included, and any rated assemblies — so the work that gets done is the work that was agreed to. A drywall estimate that doesn't specify the finish level or the panel type leaves room for a lower-quality result that still technically meets the words on the page. The detail is what protects the property owner on both sides of the residential-commercial line.
Drywall Services Across Kentucky, Southern Indiana & Greater Cincinnati
A Kingdom Construction Co. is headquartered in Louisville, Kentucky, and we handle drywall installation, repair, and finishing throughout a much larger region than the city alone. Our crews take on drywall scope across Greater Louisville and the surrounding communities, along the I-71 corridor, throughout Northern Kentucky, into Greater Cincinnati and Southwest Ohio, and across Southern Indiana. The same full range of construction services is available throughout that territory — subject to the specific requirements of your project and your local permitting jurisdiction.
Because permitting, inspection, and rated-assembly requirements differ between Kentucky, Indiana, and Ohio, working with a contractor who knows your specific jurisdiction matters. We're familiar with the offices and processes across our service area, so the drywall scope you approve is the scope that gets installed, inspected, and finished correctly the first time.
Where we work
Need Drywall Installation or Repair? Contact A Kingdom Construction
Whether it's a single patch, a basement finish, a kitchen or bathroom renovation, or a commercial buildout, drywall work is one of those scopes where the quality shows up under paint — and where doing it right the first time is far less expensive than fixing a rushed finish later. If you're planning drywall installation, repair, replacement, or finishing anywhere in our service area, our team can walk you through the scope, the finish level, the timeline, and a realistic estimate based on the actual conditions of your project.
Ready to Start Your Project?
Talk to our team about your kitchen, bathroom, basement, or whole-home project. We'll walk you through the scope, the process, and a realistic estimate.
Frequently Asked Questions
How much does drywall installation cost?
Is drywall repair cheaper than replacement?
What is the difference between drywall hanging and finishing?
What is Level 5 drywall finishing?
How many coats of joint compound are needed?
Can water-damaged drywall be repaired?
How long does drywall finishing take?
What drywall should be used in bathrooms?
Is commercial drywall different from residential drywall?
Can drywall cracks indicate structural movement?
Should drywall be primed before painting?
What should be included in a drywall estimate?
Keep Reading
How to Vet a General Contractor: 12 Questions to Ask Before You Sign
Before you sign anything, verify the contractor's license and insurance directly, get a written contract that spells out scope and payment terms, confirm who is pulling permits, and ask to see real photos and talk to a recent customer.
What Does a General Contractor Actually Do? A Homeowner's Guide to Remodeling and Construction
A general contractor does far more than hire subcontractors. Learn what a GC actually handles — planning, permits, scheduling, budgets, change orders, and inspections — and when hiring one makes sense for your remodeling project.
Why Construction Estimates Vary So Much: Understanding What You're Actually Paying For
Three contractors, three very different prices for the same project. Learn what actually drives construction estimate differences — scope, materials, labor, overhead, and hidden conditions — so you can compare bids intelligently instead of just chasing the lowest number.
How Much Does a Home Renovation Cost in 2026? A Homeowner's Guide to Kentucky, Indiana & Ohio
A realistic look at home renovation costs across Kentucky, Southern Indiana, and Greater Cincinnati — what drives price, average ranges for kitchens, bathrooms, basements, and whole-home remodels, plus how to build a renovation budget that actually holds up.
Basement Remodeling in Kentucky, Indiana & Ohio: Costs, Planning, Permits & Common Mistakes
An unfinished or outdated basement can become real living space — but moisture, ceiling height, egress, and below-grade plumbing make it the most condition-dependent renovation there is. Here's what actually drives basement finishing and remodeling costs across Kentucky, Southern Indiana, and Greater Cincinnati, plus how to plan a basement project that stays dry and on budget.
Kitchen Remodeling in Kentucky, Indiana & Ohio: Costs, Planning, Design & Mistakes to Avoid
A kitchen remodel is several projects stacked into one room — cabinets, countertops, plumbing, electrical, flooring, and finish carpentry all coordinated inside the same space. Here's what actually drives kitchen remodeling costs across Kentucky, Southern Indiana, and Greater Cincinnati, how to plan before demolition, and the mistakes that turn a kitchen project into a redo.
Plumbing Services Explained: Repairs, Installations, Upgrades & What Property Owners Should Know
Plumbing is one of the most important systems in any property — and one of the most expensive to ignore. Here's what residential and commercial property owners across Kentucky, Southern Indiana, and Greater Cincinnati should know about plumbing repairs, installations, upgrades, the phases of plumbing during construction, and the decisions that keep a plumbing project from becoming a repair.
Roof Repair vs. Replacement: How to Know What Your Property Really Needs
A ceiling stain after a storm doesn't automatically mean the whole roof has to come off — but a roof that's been repaired three times in three places may be telling you it's time. Here's how to think through the repair-vs-replace decision for both residential and commercial roofs across Kentucky, Southern Indiana, and Greater Cincinnati, what actually drives the cost difference, and when an inspection is the right next step.
Concrete Installation: What Homeowners & Commercial Property Owners Should Know Before Starting a Project
Durable concrete isn't just about pouring and smoothing — it's about what happens underneath. Here's what residential and commercial property owners across Kentucky, Southern Indiana, and Greater Cincinnati should know about site preparation, grading, drainage, reinforcement, finishing, curing, and cost before starting a concrete project.