Interior & Exterior Painting: What Homeowners and Commercial Property Owners Should Know
Painting is the most visible finish on a wall, and it's easy to underestimate what goes into making it look clean and last. The visible result — a smooth, even coating with no streaks, no flashing, and no peeling — is the product of surface preparation, the right primer, a compatible coating, correct application conditions, and a surface that's actually ready to be painted. Skip the preparation, or apply the wrong coating in the wrong conditions, and the wall that looked fine the day it was painted starts failing the next season.
For homeowners and commercial property owners across Kentucky, Southern Indiana, Northern Kentucky, and Greater Cincinnati, understanding what goes into interior and exterior painting helps with planning, with evaluating estimates, and with knowing when a repaint will solve a problem and when the underlying condition needs to be addressed first. This guide covers the difference between interior and exterior painting, residential and commercial applications, surface preparation, drywall repairs before painting, primers, interior paint finishes, exterior weather protection, what painting costs and why, the professional interior and exterior processes, weather, timelines, common mistakes, renovation coordination, maintenance, hiring questions, and the regional considerations that vary across our service territory. It's written for both residential and commercial property owners, because the fundamentals of a quality paint job are the same even when the scale and the specifications differ.
Quick answer: Interior and exterior painting are two different scopes tied together by the same rule: the preparation determines the finish. Interior coatings are chosen for appearance, cleanability, and the use of the space; exterior coatings have to withstand UV, rain, and temperature swings, and they're only as good as the substrate and preparation underneath them. Drywall repairs, primer, and the right finish sheen all have to match the surface and the conditions, and painting over moisture or damaged substrate is a coating over a problem that returns. The only accurate cost for your project comes from a site visit and a written estimate based on the actual scope.
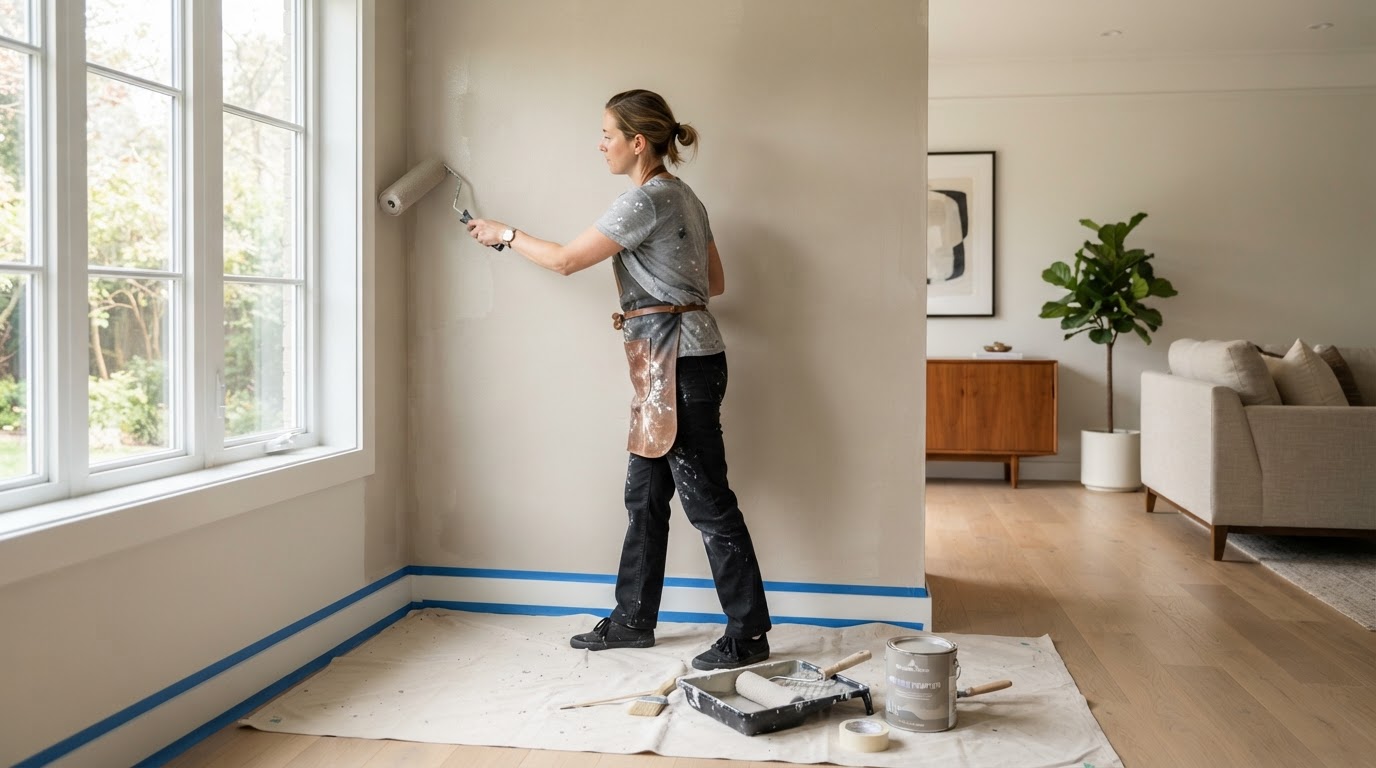
Table of Contents
Interior Painting vs. Exterior Painting — What's the Difference?
Interior and exterior painting share the same fundamentals — surface preparation, the right primer, compatible coatings, and correct application — but the conditions they have to survive are completely different. An interior wall coating is chosen for appearance, cleanability, and how it holds up to daily life inside a building. An exterior coating has to withstand sun, rain, temperature swings, wind, and humidity, and it's the visible protective layer over siding, trim, and other exterior materials. Using an interior product outside, or assuming an exterior coating performs like an interior one, is how a paint job fails before its time.
The differences show up in surface preparation, paint formulations, environmental exposure, moisture considerations, application conditions, durability expectations, maintenance, and project scheduling. Exterior work is weather-dependent in a way interior work isn't — you can't paint wet siding, and manufacturer specifications set the temperature and humidity ranges a coating can be applied in. Interior work has its own constraints — ventilation, occupancy, and protecting finished surfaces — but it isn't waiting on a dry forecast. Knowing which set of conditions applies to your project is the first step in planning it.
- Surface preparation
- Interior prep focuses on drywall repair, sanding, dust removal, and protecting floors and furniture. Exterior prep focuses on cleaning, removing failing coatings, repairing substrate damage, and caulking joints.
- Paint formulations
- Interior coatings are formulated for low odor, washability, and appearance. Exterior coatings are formulated for UV resistance, flexibility, mildew resistance, and weathering.
- Environmental exposure
- Exterior paint faces UV, rain, freeze-thaw, and wind. Interior paint faces scuffs, cleaning, humidity in kitchens and baths, and normal wear.
- Moisture considerations
- Exterior moisture comes from weather and drainage. Interior moisture comes from humidity, cooking, showers, and leaks — both have to be addressed before coating.
- Application conditions
- Exterior application is governed by manufacturer temperature and humidity specs and dry surfaces. Interior application is governed by ventilation, occupancy, and protecting finished work.
- Durability and maintenance
- Exterior coatings are inspected and repainted based on condition. Interior coatings are maintained by cleaning and touched up as needed.
Residential Painting Services
Residential painting covers the interior and exterior surfaces homeowners deal with every day. Inside, that's living rooms, bedrooms, kitchens, bathrooms, hallways, basements, ceilings, doors, and trim. Outside, it's siding, exterior trim, doors, and other paintable exterior surfaces. Each of these has its own preparation and coating requirements — a bathroom ceiling isn't painted like a living room wall, and exterior trim isn't coated like an interior door.
Painting also fits into larger residential scopes. A kitchen remodeling project ends with painted walls and trim; a bathroom renovation includes painted walls and a painted or refinished ceiling; a basement finishing scope includes drywall priming and finish paint; a whole-home renovation coordinates painting with flooring, trim, and fixture installation so the finished surface is the last thing to go in, not the first. When painting is planned as part of a renovation rather than added at the end, the sequencing protects the finish and the coating matches the design.
- Living rooms and bedrooms
- Standard interior wall and ceiling painting, with finish selection based on the room's use and lighting.
- Kitchens and bathrooms
- Higher-humidity rooms that benefit from moisture-resistant coatings and proper surface preparation around fixtures and tile.
- Hallways and high-traffic areas
- Washable, durable finishes that hold up to scuffs, fingerprints, and regular cleaning.
- Basements
- Newly finished or remodeled basement walls and ceilings, painted only after moisture and drywall work are complete.
- Ceilings
- Ceiling painting requires access equipment and flat finishes, and it's often done as part of a larger interior scope.
- Doors, trim, and baseboards
- Trim work uses higher-sheen finishes for durability and contrast, with careful cutting in at walls and floors.
- Exterior siding and trim
- Exterior coatings over wood, fiber cement, or properly prepared masonry, applied only after substrate and moisture issues are resolved.
- Renovated or newly finished rooms
- New drywall and repaired surfaces are primed and painted as the final step in a renovation, after the preparation and substrate work is done.
Commercial Painting Services
Commercial painting overlaps with residential work in the basics but differs in scale, scheduling, and the demands of the space. Offices, retail spaces, commercial interiors, common areas, commercial restrooms, property turnovers, tenant improvements, commercial exterior surfaces, and maintenance painting each have their own constraints — and the biggest is usually that the building is occupied and operating while the work happens.
Scheduling matters in commercial painting because downtime has a cost. Work is often scheduled after hours, in phases, or around tenant operations, and that coordination is part of the scope. Coating selection matters too — a high-traffic commercial hallway needs a more durable, washable finish than a low-traffic office, and a commercial restroom has different moisture and cleaning requirements than a conference room. The right coating for the use of the space, applied over a properly prepared surface, is what makes a commercial paint job hold up.
- Offices and retail spaces
- Interior painting scheduled around business hours, with finishes selected for the traffic and appearance the space demands.
- Commercial interiors and common areas
- Lobbies, corridors, and shared spaces painted with durable, washable coatings and coordinated with other trades.
- Commercial restrooms
- Moisture-resistant coatings over properly prepared surfaces, with attention to fixtures and ventilation.
- Property turnovers and tenant improvements
- Repainting between tenants or as part of a buildout, scheduled to meet the turnover timeline.
- Commercial exterior surfaces
- Exterior coatings over commercial building materials, applied after substrate and moisture conditions are evaluated.
- Maintenance painting
- Scheduled repainting based on condition rather than a fixed calendar, extending the life of existing coatings.
Commercial coatings have to match the use of the space — a high-traffic corridor, a restroom, and a conference room each call for different coating properties. A coating specified for the wrong use is one of the most common reasons commercial paint fails early, and it's avoidable by matching the product to the conditions rather than defaulting to one coating for the whole building.
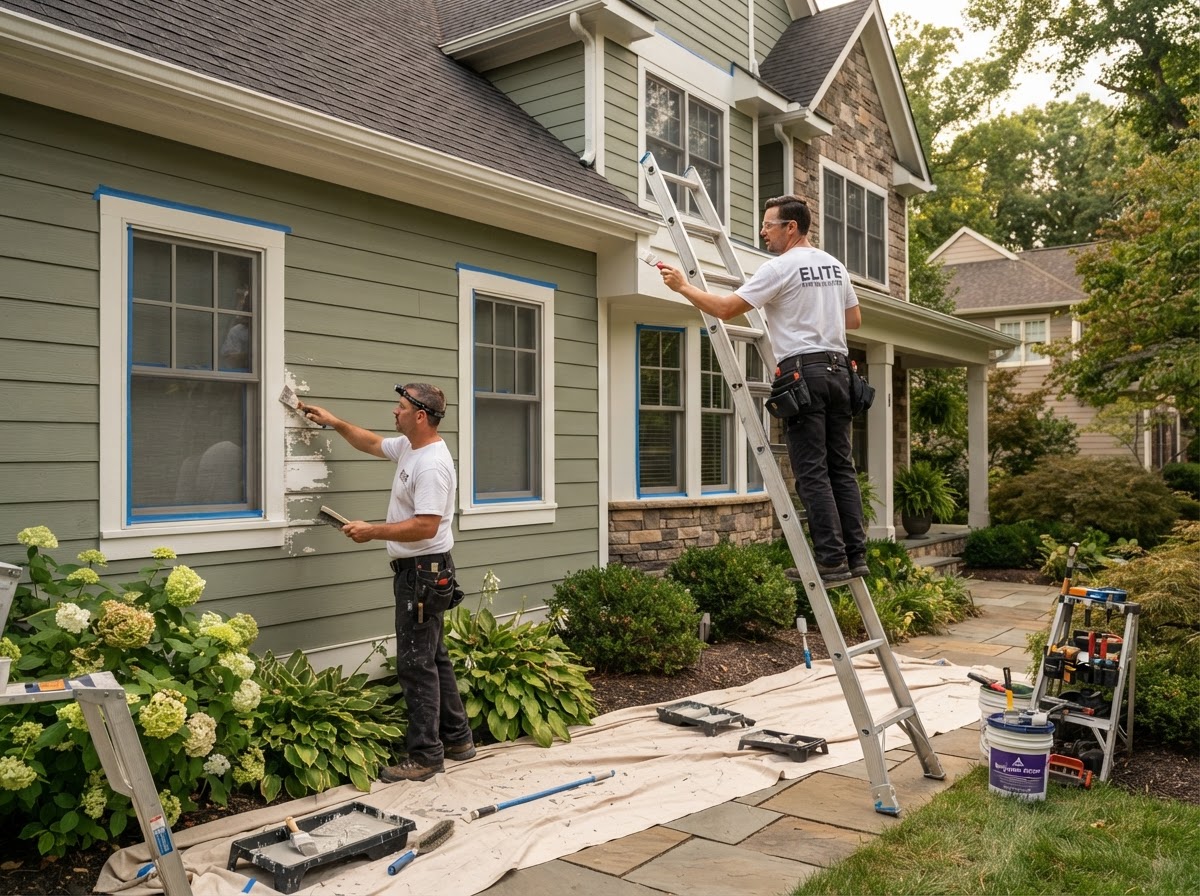
Exterior painting is weather-dependent — the substrate has to be dry, failing coatings removed, and application done within the manufacturer's temperature and humidity range.
Why Surface Preparation Is the Most Important Part of Painting
The quality of a paint job is set by what happens before the paint goes on. A coating bonds to the surface it's applied to, and if that surface is dirty, chalky, peeling, damp, or poorly repaired, the coating doesn't bond — and it fails. Surface preparation is the step that determines whether a paint job lasts years or months, and it's also the step most often cut when a project is rushed or a bid is low. The preparation that's skipped before painting is the problem that shows up after it.
Preparation means cleaning the surface, removing loose or peeling paint, repairing drywall damage, patching holes, addressing cracks, sanding, caulking appropriate joints, protecting floors and fixtures, correcting moisture problems, and priming. Each step has a reason: cleaning removes the contaminants that prevent adhesion; removing failing coatings stops the new paint from peeling with the old; repairs fix the substrate damage that would otherwise telegraph through; sanding creates the profile the coating bonds to; caulking seals the gaps that let moisture behind the finish; and primer seals the surface and provides a uniform base for the finish coat.
- Cleaning surfaces
- Dirt, grease, chalk, and contaminants prevent adhesion. Exterior surfaces may need washing; interior surfaces need dust and residue removed before any coating.
- Removing loose or peeling paint
- Failing coatings have to come off, or the new paint peels with them. Scraping, sanding, or chemical removal as appropriate to the substrate.
- Repairing drywall damage and patching holes
- Nail pops, dents, holes, and damaged areas are repaired and sanded smooth so the surface is uniform before primer.
- Addressing cracks
- Cracks are evaluated for cause — movement, settling, moisture — before they're patched. Taping over a movement crack is a repair that won't hold.
- Sanding
- Sanding smooths repairs, feathers patches into the surrounding surface, and creates the texture the primer and paint bond to.
- Caulking appropriate joints
- Gaps at trim, baseboards, exterior joints, and penetrations are caulked to seal the gap and prevent moisture entry behind the finish.
- Protecting floors and fixtures
- Drop cloths, masking, and covering protect finished surfaces from drips, spatter, and damage during the work.
- Correcting moisture problems
- Moisture from a leak, condensation, or drainage has to be corrected before painting. Coating over moisture causes peeling, blistering, and mold.
- Priming
- Primer seals the surface, blocks stains, promotes adhesion, and provides a uniform base for the finish coat. The right primer depends on the substrate and the coating system.
Inadequate preparation is the single most common cause of premature coating failure — peeling, poor adhesion, visible imperfections, and a finish that doesn't last. A paint job that skips preparation isn't cheaper; it's a coating applied over problems that reappear. The preparation is the work that makes the paint perform.
Drywall Repairs Before Interior Painting
Interior painting and drywall condition are inseparable. A wall with nail pops, small holes, cracks, damaged corners, or water stains won't look right under a fresh coat of paint — the coating highlights the defects instead of hiding them. Drywall repairs have to be completed before painting so the surface the paint goes over is the surface the finish is supposed to show. Painting over damaged drywall is a way to make the damage more visible, not less.
- Nail pops
- Fasteners backing out create bumps and cracks. The fastener is reset, the area spotted with compound, sanded, and primed before paint.
- Small holes
- Picture holes, doorknob damage, and anchor holes are patched, sanded flush, and primed so the repair doesn't show through the finish.
- Cracks
- Shrinkage cracks at joints and settling cracks are evaluated for cause, then taped, compounded, sanded, and primed before the finish coat.
- Damaged corners
- Dented or cracked corner bead is repaired or replaced so the corner is clean and straight under the paint.
- Joint repairs
- Cracked or ridged joints are re-taped and re-feathered so the seam disappears under the finish coat.
- Water stains
- Stains are addressed only after the source of the water is corrected. Stain-blocking primer is used so the discoloration doesn't bleed through the finish paint.
- Skim coating
- Surfaces with widespread texture or damage may be skim-coated to create a smooth, uniform plane before priming and painting.
- Sanding and priming repaired areas
- Every repaired area is sanded smooth and primed. Spot priming handles isolated repairs; extensive repairs or surface differences may justify priming the entire wall.
The difference between spot priming and priming entire walls comes down to the extent of the repairs and the finish. A single patch gets spot primed. Extensive repairs, a surface texture difference, a significant color change, or a high-gloss finish may call for priming the whole wall so the finish coat has a uniform base and the sheen reads evenly. The primer is what keeps a repaired area from flashing through the paint.
Related services and reading
Understanding Paint Primers and When They Are Necessary
Primer is the layer between the substrate and the finish coat, and whether it's necessary depends on what's underneath the paint and what's going on top. New drywall almost always needs primer — the joint compound and paper face are porous and uneven, and primer seals them so the finish coat adheres and reads evenly. Previously painted surfaces may or may not need primer depending on their condition, the coating being applied, and whether the existing paint is sound and compatible. Skipping primer where it's needed is a common reason a paint job looks uneven or fails early, and using primer where it isn't is unnecessary cost.
- New drywall
- Primer is required to seal the porous joint compound and paper so the finish coat has a uniform surface and adheres correctly.
- Previously painted surfaces
- Primer is needed if the existing coating is failing, if there's a significant color change, or if the new coating requires a primer for adhesion. Sound, compatible existing paint may not need it.
- Stain-blocking primers
- Used over water stains, grease, smoke, or tannin bleed after the underlying cause is corrected, so the discoloration doesn't migrate through the finish coat.
- Bonding primers
- Used over hard, glossy, or low-porosity surfaces to give the finish coat something to bond to.
- Bare wood
- Primer seals the wood grain and promotes adhesion. Bare wood painted without primer can show grain raise and adhesion problems.
- Masonry surfaces
- Properly prepared masonry may require a masonry primer or block filler to seal the surface and provide a uniform base for the finish.
- Significant color changes
- A dark wall painted light, or a strong color change, often benefits from a tinted primer to reduce the number of finish coats needed.
- Repaired areas
- Patches and repairs are primed so the finish coat reads evenly over the repair and the surrounding surface.
- Moisture-related staining
- Stain-blocking primer is used after the underlying moisture issue is resolved — primer over an active leak is a coating over a problem that will return.
There's no single primer that's right for every situation. The substrate — drywall, wood, masonry, metal, a previously painted surface — and the coating system determine the primer. A primer specified for the wrong substrate, or skipped where it's required, is a paint job that doesn't perform. The right primer is the one matched to the surface and the finish.
Choosing the Right Interior Paint Finish
Paint finish — the sheen — is a performance choice, not just an appearance choice. A finish that's too flat in a high-traffic area scuffs and won't clean. A finish that's too glossy in a wall with surface imperfections highlights every one. The right sheen balances durability, washability, appearance, and how much the finish reveals the surface underneath. Lighting matters too — raking light along a wall shows everything a flat finish would hide and a gloss finish would amplify.
- Flat
- Lowest sheen, best at hiding surface imperfections, least durable and least washable. Used on ceilings and low-traffic walls.
- Matte
- Slightly more sheen than flat with better durability, still good at hiding imperfections. A common choice for living spaces.
- Eggshell
- A soft sheen with better washability than flat or matte. A popular residential wall finish for living rooms, bedrooms, and hallways.
- Satin
- Higher sheen and better durability and washability. Used in higher-traffic areas, kitchens, bathrooms, and commercial interiors.
- Semi-gloss
- Durable and washable with a noticeable sheen. Used on trim, doors, baseboards, cabinetry, and high-moisture areas.
- Gloss
- Highest sheen, most durable and washable, and most revealing of surface imperfections. Used on doors, trim, and surfaces that need maximum cleanability — and it demands the highest level of surface preparation.
Practical guidance: ceilings are typically flat to hide imperfections and reduce light reflection; living spaces use eggshell or matte for a balance of appearance and washability; kitchens, bathrooms, and hallways lean toward satin for moisture and traffic resistance; and trim, doors, and baseboards use semi-gloss or gloss for durability and contrast. In commercial interiors, higher-traffic and higher-washability needs push toward satin and semi-gloss, and the finish has to be paired with the surface preparation that the sheen demands. The higher the sheen, the more the surface preparation matters — a gloss finish over a poorly prepped wall is a magnifier for every defect.
Exterior Painting — Protecting Your Property From Weather
Exterior paint is both an appearance and a protective layer. It shields siding, trim, and other exterior materials from UV, moisture, and temperature cycling, and it's the visible face of the building. But exterior paint only protects what it's properly applied to — and painting over damaged siding, failing flashing, or a moisture problem is a coating over a condition that will take the paint with it. The coating isn't a substitute for repairing the substrate underneath.
- Wood siding
- Requires sound, dry, clean wood with failing coatings removed, joints caulked, and a compatible primer and finish system.
- Fiber cement siding
- Painted with coatings compatible with the manufacturer's specifications, over a properly prepared and primed surface.
- Exterior trim and doors
- High-wear exterior surfaces that need durable, weather-resistant coatings and regular caulking at joints and penetrations.
- Properly prepared masonry
- Masonry may be painted if the surface is properly prepared, compatible, and free of moisture and efflorescence — not every masonry surface should be painted.
- Other paintable exterior materials
- Each exterior material has its own preparation and coating requirements; applying the wrong system is how exterior paint fails early.
Peeling paint, chalking, cracking, and deteriorated caulking are the signs that an exterior surface needs attention. Peeling usually points to moisture or adhesion failure; chalking is coating breakdown from UV exposure; cracking comes from aging, movement, or a coating that's lost flexibility; and deteriorated caulking lets water behind the finish at joints and penetrations. Each of these is a symptom — the cause has to be corrected, or the new coating fails the same way. Painting is not a substitute for repairing damaged siding, flashing, or water intrusion. The exterior work that lasts is the work that fixes the condition before it coats it.
How Much Does Interior and Exterior Painting Cost in 2026?
Painting costs range widely because painting scope ranges widely — from a single room to a whole home or commercial buildout. The factors that influence price include square footage, surface condition, ceiling height and access, whether drywall repairs or demolition are required, the number of coats, the paint quality and finish, whether primer is needed, and the project complexity. The ranges below are broad national and regional averages drawn from widely cited painting cost sources current as of the article date — not contractor quotes, and not a guarantee of what your specific project will cost. The only accurate number comes from a site visit and a written estimate based on the actual scope.
Cost ranges below are broad national/regional averages for planning, not quotes. Painting costs depend on the square footage, surface condition, ceiling height, access, drywall repairs, number of coats, paint quality, primer, and project complexity. Every project is estimated individually based on the actual scope and conditions.
- Interior room painting
- Priced per room or by square footage, varying with room size, ceiling height, number of coats, and whether trim is included.
- Whole-home interior painting
- Larger scope with economies of scale, but driven by the number of rooms, ceiling heights, trim scope, and surface condition.
- Ceiling painting
- Ceilings cost more per square foot than walls due to access, the need for lifts or scaffolding, and flat finishes that show every imperfection.
- Trim and door painting
- Priced per linear foot or per piece, with semi-gloss or gloss finishes that require careful preparation and cutting in.
- Exterior house painting
- Driven by square footage, siding type, access and height, surface preparation, and the condition of the existing coating.
- Commercial interior painting
- Larger scale with scheduling, occupancy, and coating-selection factors that residential work doesn't always carry.
- Commercial exterior painting
- Driven by building size, access, substrate condition, and the coatings required for the exposure.
- Drywall preparation and repairs
- Repairs and surface preparation are often a separate line item, priced by the extent of the work needed before primer.
- Primer application and additional coats
- Primer and additional finish coats add cost, and higher-quality coatings cost more per gallon — but they also perform better and last longer.
Square footage, surface condition, ceiling height, accessibility, the number of coats, paint quality, and project complexity all affect price — a single room in an occupied home isn't priced the same way per square foot as a whole-home repaint, and a commercial lobby isn't priced like a residential bedroom. The reason no two painting projects have the same price is that no two painting projects have the same scope, surface conditions, and coating requirements. That's why painting is estimated from a site visit, not priced from a flat rate.
The Professional Interior Painting Process
A professional interior paint job follows a sequence, and each step depends on the one before it. The preparation that's skipped at the start is the defect that shows up in the finish. The process below is the general sequence — the actual steps vary based on the project, the surface conditions, and the coatings specified.
- Step 1 — Evaluate the existing surfaces
- Assess wall and ceiling condition, identify repairs needed, and confirm the scope, colors, and finishes before any work starts.
- Step 2 — Confirm scope, colors, and finishes
- Document the areas to be painted, the coatings and sheens, and any drywall repairs so the work that gets done is the work that was agreed to.
- Step 3 — Protect furniture, flooring, and fixtures
- Move or cover furniture, lay drop cloths, mask trim and fixtures, and protect finished surfaces from spatter and damage.
- Step 4 — Complete drywall repairs and surface preparation
- Patch holes, reset nail pops, repair cracks and damaged corners, sand repairs smooth, and remove dust and contaminants.
- Step 5 — Clean and sand surfaces where appropriate
- Sand to create a bond profile, remove loose material, and clean the surface so the primer and paint adhere.
- Step 6 — Apply primer where required
- Prime new drywall, bare substrates, repairs, stain-blocking areas, and any surface that needs a uniform base for the finish coat.
- Step 7 — Cut in edges and apply paint
- Cut in at ceilings, baseboards, trim, and corners, then roll the field. Each coat is applied within the manufacturer's recoat window.
- Step 8 — Apply additional coats as needed
- Color changes, substrate conditions, and the specified finish may require two or more finish coats, each drying before the next is applied.
- Step 9 — Inspect the finished surfaces
- Review the finish for coverage, even sheen, touch up as needed, and confirm the surface meets the agreed scope.
- Step 10 — Complete cleanup and final review
- Remove masking and drop cloths, clean the site, return furniture, and complete a final walkthrough with the property owner.
The process may vary based on the project — a single room touch-up doesn't require every step at the same depth as a whole-home repaint, and a commercial buildout adds coordination and scheduling that residential work may not. What doesn't change is that the preparation determines the finish, and a sequence followed correctly is what produces a coating that lasts.
The Professional Exterior Painting Process
Exterior painting has its own sequence, and the weather and the substrate add steps that interior work doesn't carry. The exterior surface has to be dry, clean, and sound before any coating goes on, and the application has to happen within the manufacturer's temperature and humidity range. Skipping the exterior preparation — or painting over a wet or failing substrate — is how an exterior coating peels within a season.
- Step 1 — Exterior condition assessment
- Evaluate the siding, trim, and substrate for damage, rot, peeling, and the condition of the existing coating.
- Step 2 — Identify moisture or substrate damage
- Determine whether moisture, drainage, or substrate failure is causing the coating to fail — and correct the cause before painting.
- Step 3 — Surface cleaning
- Wash the exterior to remove dirt, mildew, chalk, and contaminants that prevent adhesion. The surface is then allowed to dry.
- Step 4 — Remove failing coatings
- Scrape, sand, or otherwise remove loose and peeling paint so the new coating bonds to a sound surface.
- Step 5 — Scraping and sanding where appropriate
- Feather edges of remaining coatings, smooth repaired areas, and create a bond profile for the primer.
- Step 6 — Repairs and caulking
- Repair damaged trim, siding, and substrate; caulk joints, gaps, and penetrations to seal against moisture entry.
- Step 7 — Priming
- Prime bare substrates, repaired areas, and surfaces that require a primer for adhesion or stain blocking.
- Step 8 — Paint application
- Apply the finish coating within the manufacturer's temperature, humidity, and surface conditions. Each coat dries before the next.
- Step 9 — Weather and drying considerations
- Monitor conditions during application and drying. Rain, high humidity, or temperatures outside the range can affect the coating.
- Step 10 — Final inspection and cleanup
- Review the finish for coverage and adhesion, remove protection, and clean the site.
For homes built before 1978, lead-safe renovation practices apply to painted surfaces. Current EPA Renovation, Repair, and Painting (RRP) rules require certified firms and lead-safe work practices for disturbing painted surfaces in older buildings. Lead-safe work isn't optional for applicable older properties, and it isn't a step to skip or work around — it's part of doing the job correctly. We don't recommend unsafe removal methods; the work is done to the applicable requirements.
How Weather Affects Exterior Painting
Weather is the single biggest variable in exterior painting. Temperature, humidity, rain, direct sunlight, surface moisture, drying and curing, and seasonal scheduling all determine when and how a coating can be applied. The coating manufacturer's specifications set the acceptable application conditions, and exceeding those ranges — painting too cold, too hot, or over a wet surface — is how an exterior job fails before it cures.
In Kentucky, Indiana, and Ohio, the seasonal window for exterior painting is real. Spring and fall offer milder temperatures and lower humidity; summer brings heat and sometimes high humidity; winter is generally too cold for most exterior coatings. Direct sun on a hot surface can cause a coating to dry too fast and fail to bond; high humidity slows drying and can trap moisture; rain leaves surfaces wet and unsuitable; and surface moisture from dew or recent rain has to dry before application. The right schedule for an exterior project is the one that respects the manufacturer's specs and the forecast — not one that forces the work into conditions the coating can't handle.
There's no single ideal temperature for every product. Some coatings are formulated for lower-temperature application; others require a minimum surface temperature that's higher than the air temperature. The manufacturer's specification controls, and a professional exterior painter works to those numbers rather than a generic rule of thumb.
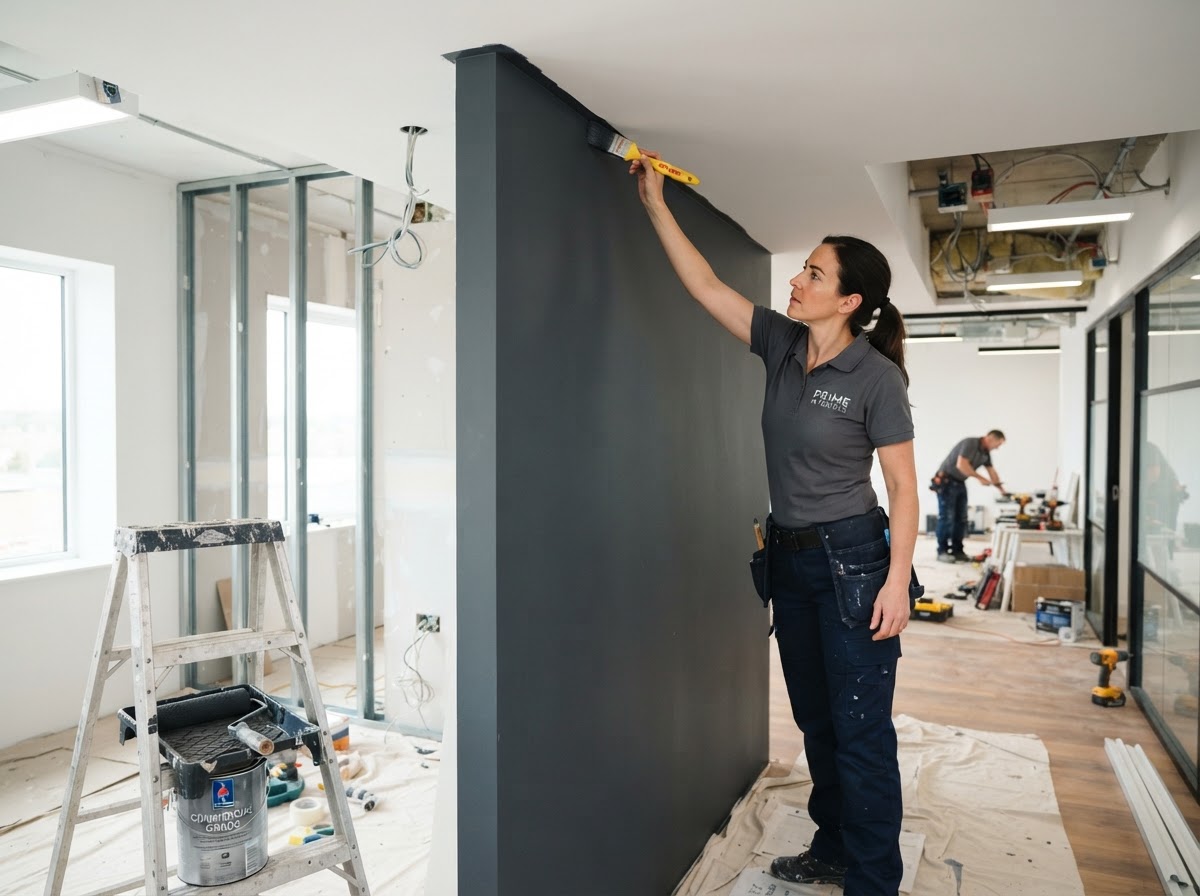
Commercial painting is scheduled around occupancy — the coating has to match the use of the space, and the work has to protect finished surfaces and operate around business hours.
How Long Does a Professional Painting Project Take?
Painting timelines depend on the size of the property, the scope of surface preparation, the drywall repairs involved, the number of coats, the paint's drying and recoat times, accessibility, occupancy, and for exterior work, the weather. There's no universal completion timeline that applies to every project, and anyone who promises one without seeing the scope is guessing.
- Property size
- A single room takes less time than a whole home or commercial buildout simply because there's less surface to prepare and coat.
- Surface preparation
- Walls in good condition go faster; walls that need drywall repairs, sanding, or extensive prep take longer before any paint goes on.
- Drywall repairs
- Repairs add time for compound drying, sanding, and priming before the finish coat — and rushing the repair shows up under the paint.
- Number of coats
- A significant color change or a high-coverage finish may need two or more finish coats, each drying before the next.
- Paint drying and recoat times
- Coatings dry and cure on their own schedule, set by the product, the temperature, and the humidity. The recoat window can't be shortened by wanting the project done faster.
- Accessibility and occupancy
- High ceilings, difficult access, and occupied or operating buildings add steps — scaffolding, after-hours work, protecting furniture and operations.
- Weather
- Exterior work is weather-dependent; rain, high humidity, or out-of-range temperatures delay application and drying.
- Commercial scheduling
- Commercial projects may be phased or scheduled after hours to minimize disruption, which extends the calendar even when the work itself is faster.
The honest answer on timeline is that a painting project takes as long as the preparation, the drying conditions, and the number of coats require — and that a schedule rushed by skipping preparation or recoat time produces a finish that shows it. A professional estimate includes a realistic schedule based on the actual scope.
Common Interior and Exterior Painting Mistakes
Most painting problems trace back to a decision made before the first coat — a surface under-prepared, a primer skipped, a moisture problem ignored, or a coating applied in the wrong conditions. These are the mistakes that show up most often, and each is cheaper to avoid than to fix after the finish is on:
- Painting over damaged drywall
- Nail pops, holes, and cracks show through the finish coat. Drywall repairs have to be completed before any paint goes on.
- Skipping necessary primer
- New drywall, bare substrates, repairs, and significant color changes need primer. Skipping it causes uneven sheen, poor adhesion, and color bleed.
- Painting over moisture problems
- Coating over a leak or damp surface causes peeling and blistering. The moisture source has to be corrected and the surface dried first.
- Using incompatible coatings
- Applying a coating not suited to the substrate or the exposure — an interior product outside, or a coating not rated for the surface — leads to premature failure.
- Poor surface cleaning
- Dirt, grease, and contaminants prevent adhesion. Surfaces are cleaned before primer and paint so the coating bonds.
- Inadequate sanding
- Under-sanding leaves repairs visible; over-sanding damages the substrate. The right sanding creates a bond profile without damaging the surface.
- Rushing between coats
- Applying the next coat before the previous one dries traps moisture and causes bubbling, lifting, or a soft finish. The recoat window is set by the product.
- Painting in unsuitable weather
- Exterior application outside the manufacturer's temperature or humidity range, or over a wet surface, causes adhesion and curing failure.
- Ignoring damaged exterior siding
- Painting over rotting or damaged siding hides the problem temporarily and fails as the substrate deteriorates. The siding has to be repaired first.
- Choosing the wrong paint sheen
- A finish too flat for a high-traffic area scuffs; a finish too glossy for an imperfect wall highlights every defect. The sheen has to match the use and the surface.
- Failing to protect adjacent surfaces
- Drips and spatter on flooring, cabinets, and fixtures are avoidable with proper masking and drop cloths. Protection is part of the scope.
- Comparing estimates without reviewing preparation requirements
- A low bid that skips primer, drywall repairs, or surface preparation isn't cheaper — it's incomplete, and the difference shows up in the finish.
Painting During a Home or Commercial Renovation
Painting is usually one of the last trades in a renovation, and its sequencing matters. Coating has to go on after the drywall is hung, finished, and primed; after flooring is installed or protected; after trim and doors are in place; and after the plumbing and electrical work that would disturb the walls is done. Painting too early in the sequence means the finish gets damaged by the trades that follow it. The right sequence protects the coating and produces a finished surface that's the last thing in, not the first.
In a kitchen renovation, painting follows drywall, cabinet, and countertop installation and coordinates with backsplash and trim. In a bathroom, it follows tile, fixture, and waterproofing work. In a basement finish, it follows drywall finishing and priming. In a commercial tenant improvement, it's scheduled with the buildout trades and often phased to meet a turnover date. In every case, the finished coating is the visible result of all the preparation underneath it — and protecting it from the work that follows is part of planning the project.
- Drywall installation
- Painting follows hanging, finishing, sanding, and priming — the surface has to be ready before the finish coat.
- Flooring installation
- Painting is coordinated with flooring so the coating isn't damaged by flooring crews, and the flooring isn't spattered by paint.
- Trim and doors
- Trim and doors are painted or finished after installation, with cutting in at walls and floors for clean lines.
- Kitchen and bathroom renovations
- Painting coordinates with cabinets, countertops, tile, and fixtures so the finished coating is the last surface in.
- Basement remodeling
- Basement painting follows drywall finishing and priming, and only after moisture and mechanical work are complete.
- Commercial tenant improvements
- Painting is phased with the buildout and scheduled to the turnover date, protecting finished surfaces and operating around the space.
- Electrical and plumbing work
- Mechanical work that disturbs walls is completed before painting so the coating isn't cut into after it's applied.
Related services and reading
How to Maintain Interior and Exterior Painted Surfaces
A paint job isn't done when the last coat dries — it's maintained over its life. Proper cleaning, monitoring for peeling and cracking, addressing moisture problems, maintaining caulking, and exterior inspections all extend the life of a coating. Repainting is based on condition rather than a fixed schedule: a coating that's still sound and adhering doesn't need to be repainted, and a coating that's failing doesn't get better by waiting.
- Appropriate cleaning
- Clean painted surfaces with methods and cleaners compatible with the finish. Higher-sheen finishes tolerate more cleaning; flat finishes can be marred by aggressive scrubbing.
- Monitoring peeling and cracking
- Peeling, cracking, or blistering are signs of adhesion or moisture failure. Addressing them early prevents the problem from spreading.
- Addressing moisture problems
- Moisture from a leak, condensation, or drainage causes coating failure. The source has to be corrected before the coating is repaired.
- Maintaining caulking
- Deteriorated caulk at trim, joints, and exterior penetrations is replaced so moisture doesn't get behind the finish.
- Touch-up considerations
- Small nicks and scuffs can be touched up if the coating is available and the surface is compatible; larger areas may need a full coat for uniform sheen.
- Exterior inspections
- Periodic inspection of exterior coatings — especially south- and west-facing walls — catches UV and weathering wear before it becomes failure.
- Repainting based on condition
- Repaint when the coating shows wear, fading, or failure — not on a fixed calendar. A coating in good condition doesn't need to be replaced.
No coating lasts forever, and no specific coating lifespan can be guaranteed — exterior coatings in full sun wear faster than sheltered surfaces, and high-traffic interior walls wear faster than low-traffic ones. The coating that lasts is the one applied over a properly prepared surface, maintained correctly, and repainted when it shows wear rather than after it's already failed.
Questions to Ask Before Hiring a Painting Contractor
The right questions before hiring a painting contractor protect the project. A contractor who can answer these clearly and put the answers in writing is one who scopes the work correctly — and a contractor who can't is one worth learning more about before signing. These questions also connect to the broader guidance in our article on vetting a general contractor.
- What preparation is included?
- The scope of cleaning, sanding, repairs, and priming should be specified in writing — the preparation is what determines the finish.
- Are drywall repairs included?
- Clarify whether drywall repairs are part of the painting scope or a separate line item, and what repairs are needed.
- What paint products will be used?
- The coating brand, line, and finish should be specified so the product is known, not just the color.
- How many coats are included?
- The number of finish coats — and whether primer is included — should be stated so coverage and cost are clear.
- Is primer included?
- Primer for new drywall, repairs, or color changes should be specified as included or as a separate cost.
- Who supplies materials?
- Whether paint and materials are included in the price or supplied separately should be clear in the estimate.
- How will furniture and floors be protected?
- Protection of finished surfaces — drop cloths, masking, moving furniture — is part of the scope and should be confirmed.
- How will exterior repairs be handled?
- If the exterior needs siding, trim, or flashing repairs before painting, clarify whether those are part of the scope.
- What is included in cleanup?
- Removal of masking, drop cloths, and waste, and a final walkthrough, should be part of the scope.
- What warranties or workmanship terms apply?
- Any workmanship terms should be in writing, and the property owner should know what's covered and for how long.
Related reading
Painting Services Across Kentucky, Southern Indiana & Greater Cincinnati
A Kingdom Construction Co. is headquartered in Louisville, Kentucky, and we handle interior and exterior painting throughout a much larger region than the city alone. Our crews take on painting scope across Greater Louisville and the surrounding communities, along the I-71 corridor, throughout Northern Kentucky, into Greater Cincinnati and Southwest Ohio, and across Southern Indiana. The same full range of construction services is available throughout that territory — subject to the specific requirements of your project and your local permitting jurisdiction.
Because permitting, inspection, and lead-safe renovation requirements differ between Kentucky, Indiana, and Ohio, working with a contractor who knows your specific jurisdiction matters. We're familiar with the offices and processes across our service area, so the painting scope you approve is the scope that gets prepared, primed, and finished correctly the first time.
Where we work
Planning an Interior or Exterior Painting Project?
Whether it's a single room, a whole-home repaint, a commercial buildout, or an exterior project, painting is a scope where the preparation determines the finish — and where doing it right the first time is far less expensive than fixing a rushed job later. If you're planning interior painting, exterior painting, drywall repairs, or a renovation anywhere in our service area, our team can walk you through the scope, the surface preparation, the coatings, the timeline, and a realistic estimate based on the actual conditions of your project.
Ready to Start Your Project?
Talk to our team about your kitchen, bathroom, basement, or whole-home project. We'll walk you through the scope, the process, and a realistic estimate.
How much does interior painting cost?
How much does exterior house painting cost?
Is primer always necessary?
Should drywall be repaired before painting?
How many coats of paint are usually needed?
What is the best paint finish for high-traffic areas?
Can exterior painting be done in cold weather?
How long does interior paint take to dry?
Is commercial painting different from residential painting?
What causes exterior paint to peel?
Should walls be primed after extensive drywall repairs?
What should be included in a professional painting estimate?
Keep Reading
How to Vet a General Contractor: 12 Questions to Ask Before You Sign
Before you sign anything, verify the contractor's license and insurance directly, get a written contract that spells out scope and payment terms, confirm who is pulling permits, and ask to see real photos and talk to a recent customer.
What Does a General Contractor Actually Do? A Homeowner's Guide to Remodeling and Construction
A general contractor does far more than hire subcontractors. Learn what a GC actually handles — planning, permits, scheduling, budgets, change orders, and inspections — and when hiring one makes sense for your remodeling project.
Why Construction Estimates Vary So Much: Understanding What You're Actually Paying For
Three contractors, three very different prices for the same project. Learn what actually drives construction estimate differences — scope, materials, labor, overhead, and hidden conditions — so you can compare bids intelligently instead of just chasing the lowest number.
How Much Does a Home Renovation Cost in 2026? A Homeowner's Guide to Kentucky, Indiana & Ohio
A realistic look at home renovation costs across Kentucky, Southern Indiana, and Greater Cincinnati — what drives price, average ranges for kitchens, bathrooms, basements, and whole-home remodels, plus how to build a renovation budget that actually holds up.
Basement Remodeling in Kentucky, Indiana & Ohio: Costs, Planning, Permits & Common Mistakes
An unfinished or outdated basement can become real living space — but moisture, ceiling height, egress, and below-grade plumbing make it the most condition-dependent renovation there is. Here's what actually drives basement finishing and remodeling costs across Kentucky, Southern Indiana, and Greater Cincinnati, plus how to plan a basement project that stays dry and on budget.
Kitchen Remodeling in Kentucky, Indiana & Ohio: Costs, Planning, Design & Mistakes to Avoid
A kitchen remodel is several projects stacked into one room — cabinets, countertops, plumbing, electrical, flooring, and finish carpentry all coordinated inside the same space. Here's what actually drives kitchen remodeling costs across Kentucky, Southern Indiana, and Greater Cincinnati, how to plan before demolition, and the mistakes that turn a kitchen project into a redo.
Plumbing Services Explained: Repairs, Installations, Upgrades & What Property Owners Should Know
Plumbing is one of the most important systems in any property — and one of the most expensive to ignore. Here's what residential and commercial property owners across Kentucky, Southern Indiana, and Greater Cincinnati should know about plumbing repairs, installations, upgrades, the phases of plumbing during construction, and the decisions that keep a plumbing project from becoming a repair.
Roof Repair vs. Replacement: How to Know What Your Property Really Needs
A ceiling stain after a storm doesn't automatically mean the whole roof has to come off — but a roof that's been repaired three times in three places may be telling you it's time. Here's how to think through the repair-vs-replace decision for both residential and commercial roofs across Kentucky, Southern Indiana, and Greater Cincinnati, what actually drives the cost difference, and when an inspection is the right next step.
Concrete Installation: What Homeowners & Commercial Property Owners Should Know Before Starting a Project
Durable concrete isn't just about pouring and smoothing — it's about what happens underneath. Here's what residential and commercial property owners across Kentucky, Southern Indiana, and Greater Cincinnati should know about site preparation, grading, drainage, reinforcement, finishing, curing, and cost before starting a concrete project.
Drywall Installation & Repair: What Homeowners and Commercial Property Owners Should Know
A smooth, paint-ready wall is the result of correct hanging, taping, multiple coats, and careful sanding — not just panels screwed to studs. Here's what residential and commercial property owners across Kentucky, Southern Indiana, and Greater Cincinnati should know about drywall installation, repair, finishing levels, water damage, and cost before starting a project.